
The Ultimate Guide to Candle Care
May 01, 2023
Candle Care
Only burn your candle in safe conditions (away from pets, drafts, and flammable items such as curtains, etc) and when you are around and alert. Less obvious, but still important: only burn your candle when you have enough time for it to be lit for several hours. This will prevent future problems and help your candle to perform its best. If you're in a hurry or anticipate needing to leave after a short while, it's really best to wait for a better opportunity. Short burns can lead to tunneling. Many candles also need a larger melt pool before their fragrance disperses fully.
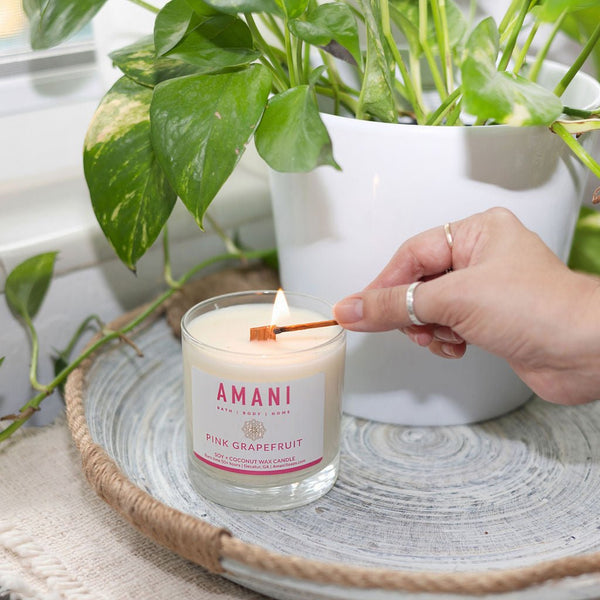
Before you light your candle, trim your wick straight across. The wick should be about 1/4" tall. My favorite tool for this is a wick trimmer or a pair of small tin snips; regular scissors will work as long as they can reach the wick. You can also use a small piece of paper towel to break off the charred tip. Trimming will help keep your flame strong, prevent smoking, and keep debris out of the candle. Wood wicks need to be trimmed regularly particularly on the first few burns. If your flame is very small or has self-extinguished, trim the wick just a tiny bit and light it again. It can sometimes take some effort to establish a good flame but once you do, keep your candle burning for several hours. A good burn should produce a pool of melted wax that extends to the sides of the jar.
A quick side bar about scent. Different scents will have different degrees of cold (unlit) and hot (lit) throw. If you want a strong (or lighter) scent, drop me a message and I can advise you on the best options from our offerings. You will get the best hot throw when your candle has a full melt pool so keep it burning! Finally, choose the right location for your candle. A 4 oz candle tin is better suited for a powder room than an open concept kitchen-living room.
When you are ready to put out your candle, extinguish it properly. I know, most people just blow out candles (even me) but there's a better way to do it. A candle snuffer works great because it contains the smelly smoke that is released if you were to just blow it out. If you have a traditional cotton wick, you can also use a wick dipper or similar tool to very carefully bend over the wick into the melted pool of wax. This will contain all the smoke and as a bonus aid in lighting the candle next time. If you choose to dip the wick in the wax, please do it slowly so that the wick does not snap off.
Troubleshooting Common Candle Issues
We have found that wood wick candles are more likely to have a smaller flame than cotton wick candles. A smaller flame is not necessarily a sign of a problem as long as it stays lit.Below are some common candle issues and how to fix/prevent them.
- You may need to trim the wick a little. Contrary to what seems logical, I have found that wood wick candles perform better with a slightly shorter wick. Trim just the tiniest bit from the top of your wick. Use scissors, small tin snips, nail clippers, your fingers, or wick trimming scissors to trim just the very top of the wick. If the wick is uneven, just trim enough to return it to a horizontal line. The amount you trim off should be the least amount possible but it will depend on your wick length, of course.
- If it appears that the wick is not getting enough air, you can scrape away a bit of the wax from the wick. You can either move the excess wax to the side of the jar or remove it entirely. This will expose more of the wick which should help the melted wax pool to become large enough to properly pull up the wax to the flame. Tip: if you have an electric wax melter (like Scentsy), put the excess wax here so it isn't wasted.
- If your wick is too short and is getting covered by the melted wax pool, blow your candle out, then use a paper towel to absorb a bit of the melted wax. As previously mentioned, once you get your candle going, allow it to burn for several hours.
Tunneling: If your candle is burning straight down the middle and leaving wax on the sides, then it is tunneling. Tunneling can be hard to fix so prevention is key as it frequently happens when the first burn isn't long enough to reach to the side of the vessel. However, keep in mind that some excess wax on the side of a candle jar isn't necessarily a problem as long as you have a good flame. Candles tend to burn hotter the further down they move in the jar, so mild to moderate tunneling will often self-correct. Unfortunately, it can be challenging to fix a severly tunneled candle where the flame won't even stay lit. Your best bet is to light it and burn it for as long as possible. If the flame goes out, keep trying and sometimes the wax will get soft enough to melt and allow in sufficient air and fuel. If necessary, try removing some excess wax from the side of the jar. If all else fails, put your candle in the freezer, pop out the frozen wax with a butter knife, and move it to a wax melter.
Smoking/carbon build up: If your candle is smoking, it could be due to a wick that's too long or wick debris in the wax. Trim the wick and remove any debris before relighting.
When your candle has burned to around 1/2" from the bottom of the vessel, it is time to say goodbye. Put it in the freezer and carefully remove the remaining wax with a butter knife once it is frozen (put the excess in a melter if you have one). Never put a candle in the microwave as the wick contains a metal tab!
Looking for great candle options? We have wood wick candles as well as unique gift candles with a keepsake stone. We also have a gift box which includes a candle tin, soap and lotion.